


Hello RSTLings!
Today we are going to have a look at the Creator Portal version 1.0, which has just opened for all RSTLSS holders.
The Website
The website is ugc.rstlss.xyz so make sure you type that in when you come into the RSTLSS Creator Portal.
If you own a RSTLSS NFT, you already have access to this website.
All you'll have to do is sign in using your wallet that contains the NFT(s), and it will take you through to the main page of the Creator Portal.
My Creations Page

All your silhouettes that are created will be here.
Let’s click on New Creation, and at the moment for the beta, we have these three different silhouettes that you can choose from.
The Essential Hoodie

Essential Hoodie: Free mint (mint fee: 0 ETH, platform fee: 0.0008 ETH). You will also be awarded 100 Transmutium (T+) retroactively when that feature goes live.
The Celestia Pant
Celestia Pant: Charged at 0.008 ETH each (mint fee: 0.008 ETH, platform fee: 0.0008 ETH). You will be awarded 1000 Transmutium (T+) for each of these items retroactively when that feature goes live.
The Celestia Puffer

Celestia Pants and Celestia Puffer: Charged at 0.008 ETH each (mint fee: 0.008 ETH, platform fee: 0.0008 ETH). You will be awarded 1000 Transmutium (T+) for each of these items retroactively when that feature goes live.
The puffer seems to be the most popular, so we are going to try that one out today.
The My Glyphs Page

Once you've selected your silhouette, it'll take you to the My Glyphs page.
The different boxes are where your glyphs—your artwork—will be populated.
You can start uploading artwork that you have the IP rights to, meaning art you have created or any CCO pieces.
Push ‘Add Glyphs’. Here we can upload images one by one and name them.
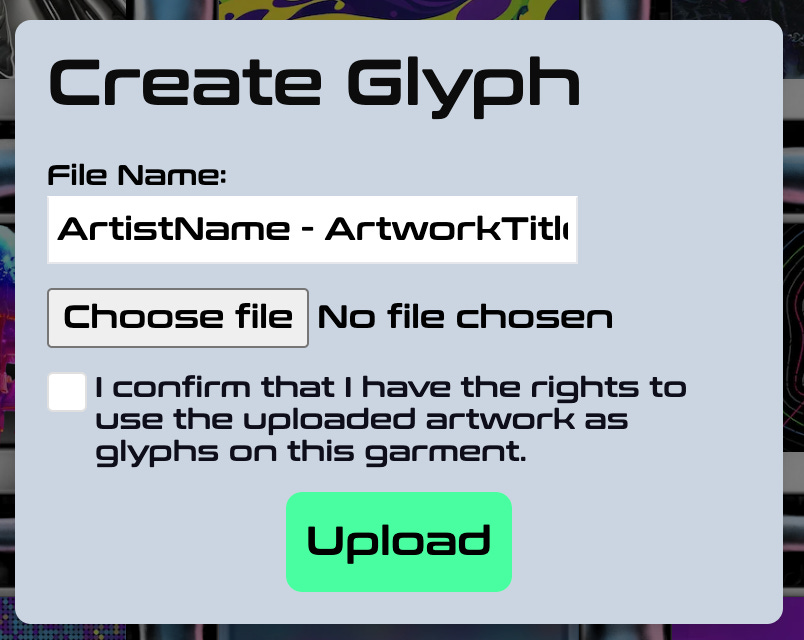
Once you have selected an art piece to upload, what you want to make sure of here is the file name. The file name will be in the metadata of the NFT when you mint it. What you want to do is make sure that it contains both the artist's name and the artwork name.
Once you are happy with the name, down below it says ‘I confirm that I have the rights to use the uploaded artwork as a glyph.’ Check this if it applies, and hit upload. It will take a minute to upload into your My Glyphs page.
If you are happy with the Glyphs you have uploaded, scroll down to see Creators number three and click it.
The Creation Page

This is the 3D creation page, where all the exciting customization happens.
The puffer is what is rotating in the middle.
Before we do anything, we want to make sure that our creation has a name.
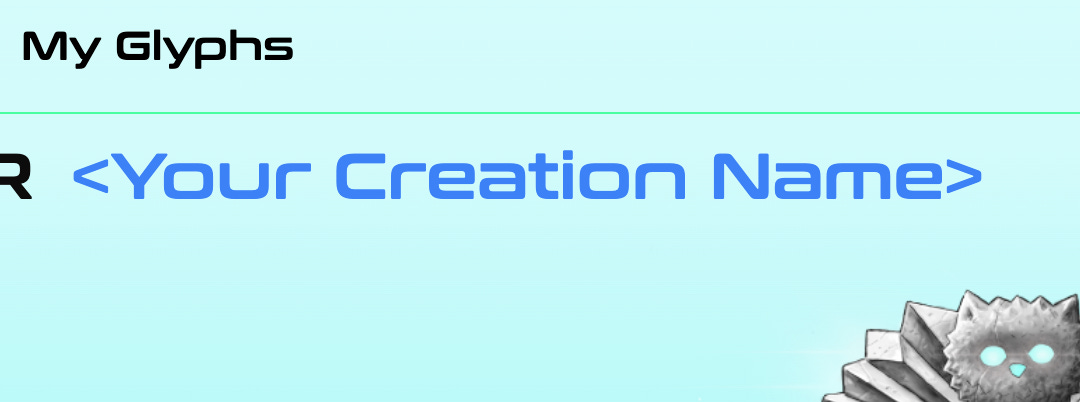
If you submit your piece without a creation name, it will be rejected, and you will have to start all over again from scratch. At the top, it says ‘Your Creation Name’; click it to edit the name.
You are able to navigate by clicking and scrolling to rotate the item in the middle and to zoom in and out. This allows for further customization, so when we start adding our glyphs, it will be easier to customize.

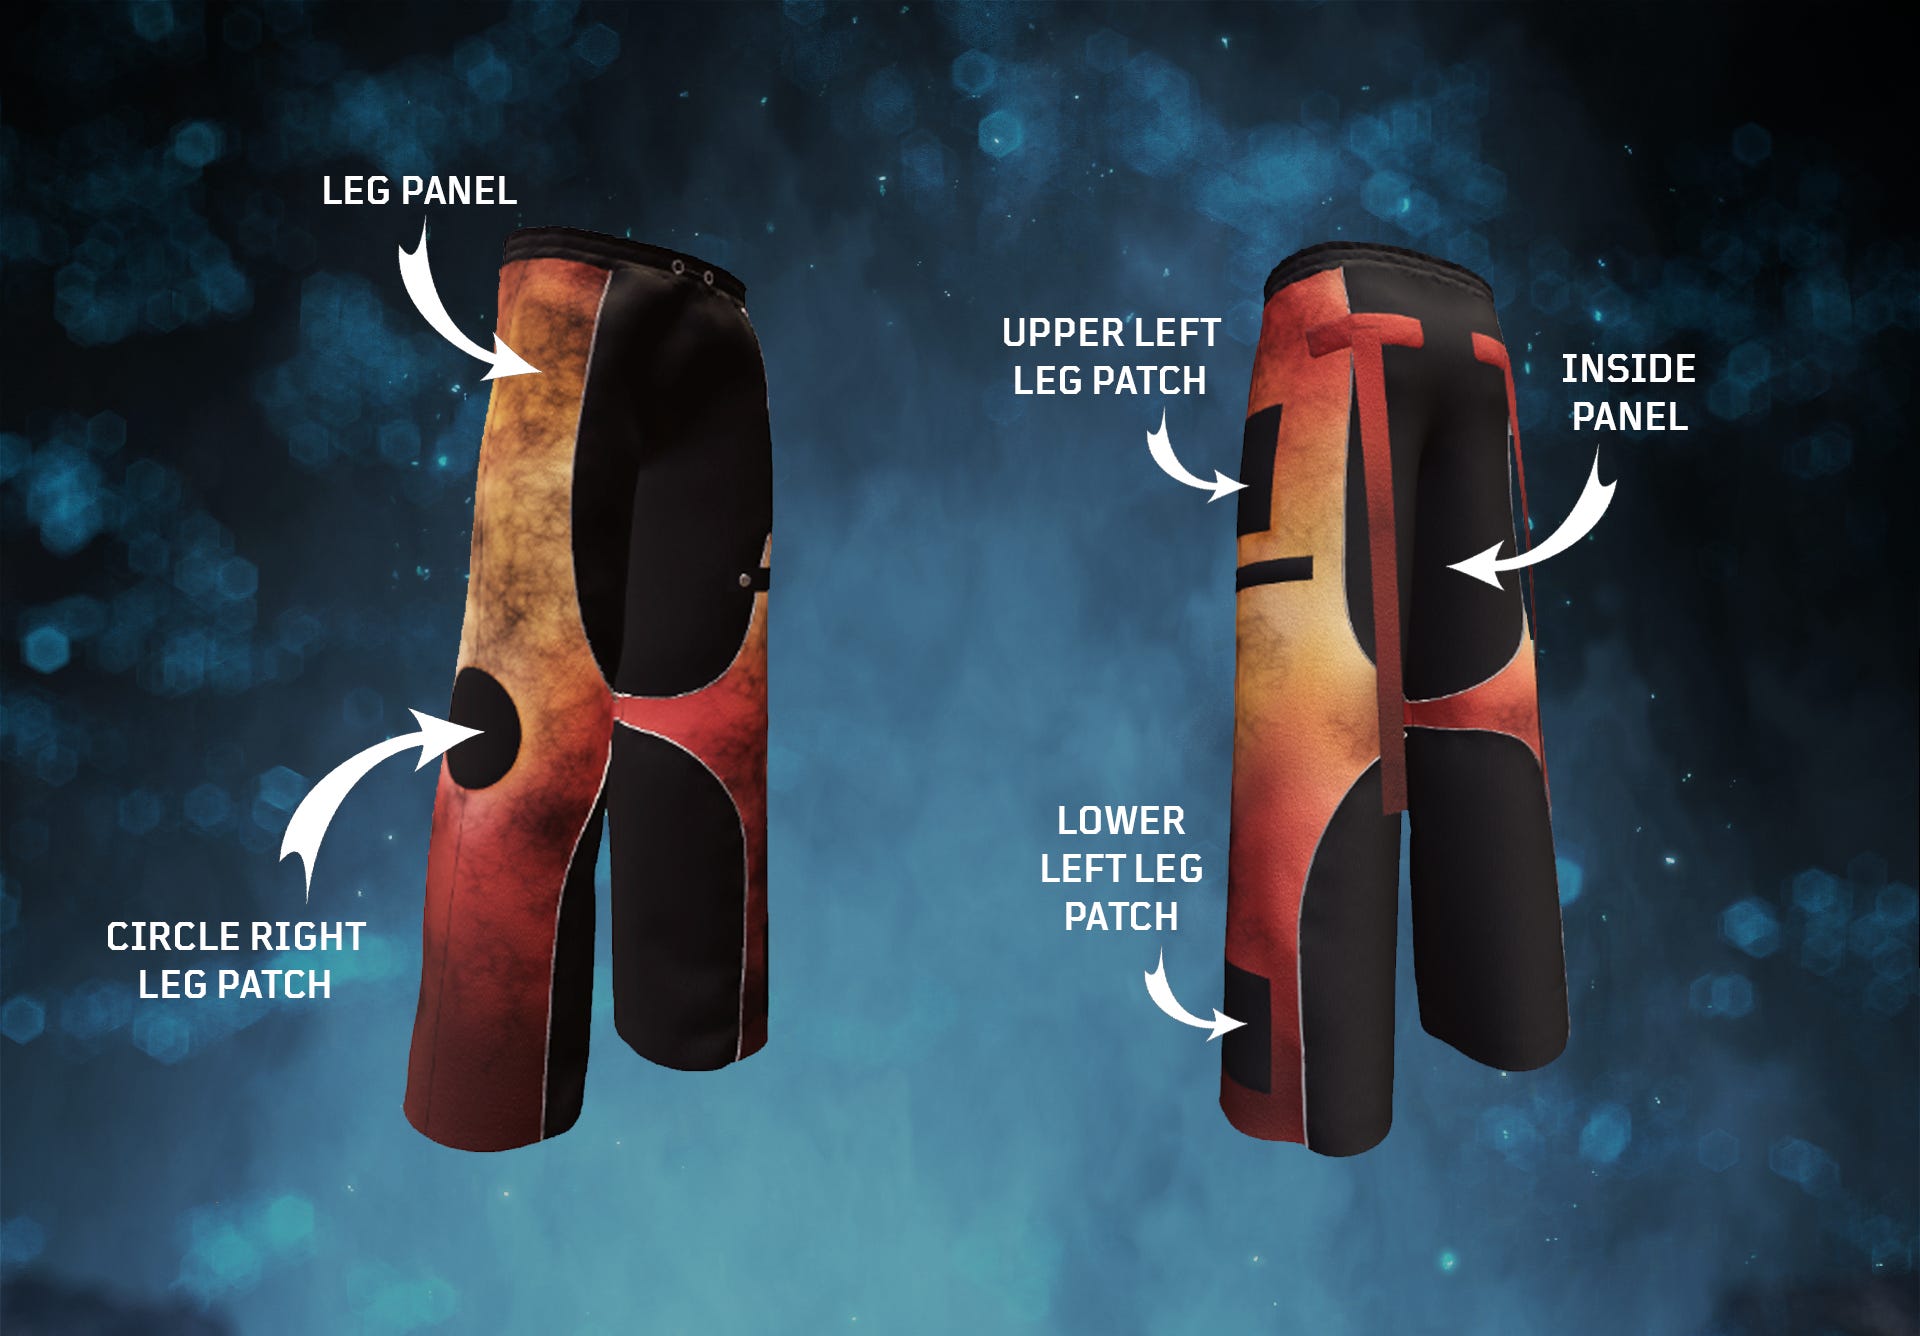
The section to the left is where you can start adding glyphs to certain slots or patches on the silhouette. If I select a slot it will automatically populate the first glyph from my Glyphs page. You can then change it to any of the other glyphs you have uploaded.

When one of the glyph slots is populated and selected, we can see that the selection on the right-hand side can be customized.
Here, you can change the glyph size, rotation, and transparency of your glyph to control how it looks on the silhouette.
The Submissions Page

Once you're satisfied, hit the save button, and this will bring you to the last page, where you can check everything. All beta designs also come with Union Avatar utility. We will cover this in a separate post.
This is your last opportunity to check that everything is correct, that your design has a name, and that the glyphs you've used are ones you have IP rights to. You can then save to drafts or submit for approval.
At the moment, we are manually reviewing everything.
Once you hit submit, a pop-up will appear, giving you the option to be notified by email about your submission's approval. This will allow you to mint your piece as soon as it's approved. This step is optional; you can skip it or add your email and submit.
Waiting for Aproval
When we return to the main page, the status will show that it's submitted for review. You can see all the details there, and under actions, you can either delete the piece or click on preview.
Minting
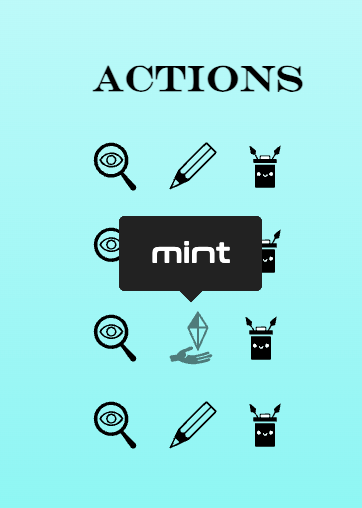
Once your piece is approved, you will see a new mint button appear next to your creation. This allows you to mint your piece.

To pay using ETH on Base, select ‘Pay by Crypto’ and sign the usual transactions to mint.

To pay using a credit card or another cryptocurrency, such as mainnet ETH or Solana, select ‘Pay by Fiat’ and a new pop-up powered by Crossmint will appear, allowing you to enter your details or connect the wallet accordingly.
Once minted, your pieces can be claimed as Union Avatars and enjoyed in virtual worlds that accept VRM format avatars or can be sold on any NFT selling platform of your choice!
In Conclusion…
This is, in a nutshell, what the Creator Portal looks like at the moment.
If you have any questions, feel free to ask away!
If you face any issues, feel free to open a ticket on our Discord, and we'll get to you as fast as possible.
Hopefully, this gives you an idea of what it's like, and we can't wait to see what you create!


